
How to use oil pastels in mixed-media?
- Jul 25, 2020
- 3 min read
Updated: Sep 30, 2025
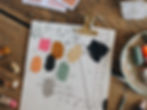
I've recently treated myself to a few gorgeous colours of Sennelier Oil Pastel sticks. I have to say these are one of my all time favourite products. And as I was enjoying their creaminess I thought...
what a shame that so very few people use them confidently in their mixed-media.
You know I'm always on a mission, so here I am today explaining more about oil pastels.
First of all let's make things clear, oil pastels are not the same as crayons. Crayons are based on wax while oil pastels are made out of pigment, wax and non-drying oil.
Oil pastels smudge. They make your hands messy and never fully dry. Sounds like a bit of trouble and you probably wonder how could you use them?
They are not the easiest supply, I admit, but once you experience their creaminess, their buttery texture and colours they give, you'll be hooked, I promise. As with many art supplies we need to learn about them a little to enjoy them properly.

Here's the one most important rule for all of you mixed-media Adventurers who fancy a bit of oil pastel experience:
Always use them as your last last layer.
This is because water and oil don't mix.
I'm guessing that your mixed-media process is probably dominated by water-based mediums: acrylic paints, gesso, watercolours, inks etc. They all work together beautifully, but they won't agree with oil pastels. You can play and experiement, but they will resist, nothing will stick to an oil pastel mark. But oil pastels will stick to almost everything.
It's as if water-based stuff would be the dinner and oil pastels your pudding. Eat the pudding first and strange things may happen in your stomach. ;)
Try this:
1. Do your painting as you normally would. Collage, abstract, portrait - whatever you fancy. Use all your scrumptious layers of water-based mediums.
2. Once it's all dry grab one or two colours of oil pastels and make a few marks here and there. Maybe add a colour accent to your abstract composition? Or mark darkest shadows or highlights on your portrait? And then you can layer them too!
3. I can promise you, you'll love the effect, but go easy tiger - less is more and better be slow. Oil pastels are not easy to remove once you've applied them.
4. Then you can also grab a skewer and scratch some marks in your oil pastels to make it even more of a "wow-i-want-to-bath-in-it" experience.
One of the best things in the world that you can experience is using oil pastels with encaustic collage. If you want to know how I'm doing it join my mini-course that will introduce you to all the basics of encaustic plus there are some collage and image transfer techniques too!
I know there's probably one pressing questions that many of you want to ask right now: how do you fix oil pastels?
The truth is oil pastels never really dry. Remember that non-drying oil binder I mentioned? That's the reason. There are products that you can spray over your painting and they will help the pastel harden a bit, but it will never be as dry as a layer of acrylics is.
Oil pastel marks will also collect dust and that's the reason why you should always frame your oil pastel pieces behind glass. And if you sell, you must tell your buyer that this simply has to be framed behind glass.
To be honest with you I never fix my art journal page. Just as with dry pastels I embrace their ever-changing nature and once I'm done with a spread I close the book and don't look back. Process is what counts to me the most!
You may also be wondering if Sennelier are the only good brand? Definitely not, I'm sure there are lots of other brands that give gorgeous results. The things is though that once I tried Sennelier I was so hooked I never invested much in any other brand. This was exactly what I wanted.
So here you have it. Now it's your turn to play with oil pastels. If you are planning to buy, remember my rule - never buy a basic set of colours, because you'll end up never using many of them. Instead buy 4-5 single sticks in colours that are your all time favourite.